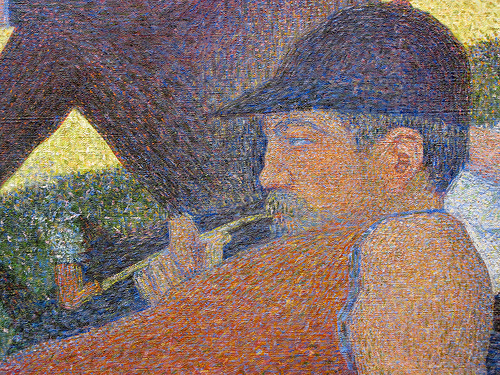
1. Choose a well-known image, preferably a masterpiece, and identify the most important design elements and principles to re-create. I'll use the image example from eCollege, A Sunday Afternoon on the Island of La Grande Jatte - 1884 (French: Un dimanche après-midi à l'Île de la Grande Jatte - 1884). This painting is one of Georges Seurat's most famous works, and is an example of pointillism.

In pointillism, the artist composes the image of thousands of tiny dots of color. From far away, the dots come together as a solid image, but if one views the painting up very close, all of the tiny dots would become visible.
This technique is extremely time-consuming and labor intensive, and you will create the same look with thousands of tiny little dots from the pen tool in Illustrator. No, no, only kidding...just a little Illustrator humor for you. No, we will do the exact opposite and find the major shapes and colors and re-create them in a simplified form.
Take another look at the first image, and notice that the important unifying features are similar geometric shapes and colors placed throughout the image. There is also a distinct rhythm that is apparent in the repeating shapes and colors, steadily receding into the background. Our eyes are pulled back into the deep space with the heavy diagonal line of the river, and the illusory space compounded by the vertical lines of the trees, both maintaining a believable perspective. Though there is plenty of variety in color and shape, the tone is overall muted and peaceful, giving us a sense of a lazy, though bustling, Sunday afternoon. These are the kinds of design elements and principles you should look for and try to re-create in your own chosen piece for this project.
2. Now, open a new document in Adobe Illustrator CS5 by selecting File, New from the Menu Bar and select the default web format. Place your saved jpeg onto your artboard by selecting File, Place from the Menu Bar and browsing to your saved file. Resize the image to fill the screen by hitting Ctrl + T and then repositioning and resizing as needed, by dragging the corners . Hold down the Shift key to constrain proportions when needed, and hit Enter when done.

In the Layers panel, double-click on the one available layer and rename it "Template" (I don't select the "template" option, because this function will gray out the image and make it more difficult to see details) Lock that layer and make a new layer, called "large shapes." On this layer, start creating the largest, most basic background shapes.
Use the Shape Tool (L), chosing between ellipse, rectangle, rounded rectangle, and polygon, and remember that after a shape is created, it can be further manipulated. After finishing the shape, switch to the Selection tool to resize or rotate, or the Direction Selection tool to manipulate parts of the shape like an edge or an achor. All shapes created in this way can be changed just as any vector shape.

Keep it simple by using a combination of the Pen tool, and the Shape tools. In some areas with many curves, the Pencil tool is most practical, but staying simple will help control the unity of your piece. For color, use the Eye-dropper tool to select colors directly from your original image. Sampling from the masterwork is the best way, with the least amount of effort, to keep to a harmonious color scheme--it's not a masterpiece for no reason!

You will need to move shapes around to avoid obliterating your previous work. Select the shape that needs to be moved and go to Object, Arrange, Send Backward (or Send To Back, or Bring Forward, or Bring To Front).

Try to keep your shapes within the confines of the artboard, and don't fall into the trap of thinking you can just crop the image later. Many Photoshop users make this mistake, not understanding that there is no "crop" function in Illustrator.

Remember to save often!
2. Turn off visibility of the "large shapes" layer by clicking the eye icon to the left of that layer, and lock it by clicking in the lock square. You just want it out of the way for right now, so that you can see the original image on the "template" layer and not mess up what you have done by accidentally changing it. Create a new layer on the top of the list, and call it "mixed color shapes." Lock all other layers.

Now, you must re-create all those little shapes! Best practice is to get into a rhythm and use keyboard shortcuts. You will use the same tools as above; the Pen, Shape, and Pencil tools, and again sample colors with the Eye-dropper tool.
Your workflow might be something like... 1. Hit the "I" key for the Eye-dropper and sample a color from the original. 2. Hit "L" for the Shape tool and draw the approximate shape. 3. Hold down the "V" key while clicking off the shape to deselect. 4. Hit "I" to sample another color. 5. Hit "P" for the Pen tool to draw the shape. 6. Hit the "V" key to switch to the Move tool to re-position. 7. Hit Ctrl + [ to move the shape backwards. Copy and Paste shapes where appropriate, re-sizing and rotating. Save often!
You will come up with your own rhythm, obviously, and this step will take some time, but there is no way around effort to produce something that is visually worthwhile. By the end of the second step, you should have something like this:


Don't worry about perfection (sometimes the quirky mistakes made with the Pen tool are quite interesting!), but zoom in closer with the Zoom tool, and use more anchor points to outline the figures. Save often!

You may need to create several "detail" layers and turn visibility on and off to build up the foreground.

4. Should you need to fill in blank areas, use the power of layers to create background fill shapes on new layers where needed and move your layers around accordingly. For shadow areas, first create the shape and then open the Transparency panel by choosing Window, Transparency from the Menu Bar. Adjust the opacity to about 50% and allow shapes underneath to show through. You can have as many "shadow" layers as you need and move them where they are needed between other layers.

The amount of detail used is optional and conditional on each unique project, but make sure that your vector version of the artwork is similar to the original in terms of the most important design elements used and design principles followed. Make sure to go back and re-read step one, to remember the important concepts that were identified in the beginning. The point of this project is not to make a perfect replica of a masterwork, but to create your own "vector version" of the artwork, capitalizing on the concepts that you find to be most important and most amenable to Adobe Illustrator.
